Year: 2019

Object Dependency Checking in Snowflake

Object Dependency Checking in Snowflake

Snowflake allows dropping of an object that has a view dependent on it. For example, create tables A and B, and view C that joins A and B together. Snowflake will allow you to drop table A or B, and when you attempt to use view C you will get an error. This behavior is fairly common for DBMSes.

It’s important to document and maintain dependencies using a combination of object (source) control, a rigorous testing regimen, and promotion protocols. That said, here’s a stored procedure to check object dependencies, specifically to see if all views are working. The stored procedure inventories all views in the Snowflake account and attempts to select a single row. If the row selection succeeds, it reports success for that view. If it fails, it reports the reason for the failure.

Note that running this stored procedure could take a very long time since it needs to select one row from every view in the account. This is a prototype procedure, and a future version will include the ability to limit the database and/or schema to test, probably using RegEx to enable pattern matching. This will allow testing of all views in the PROD database matching something like a prefix, since whatever change may be only likely to affect views in that database starting with a prefix.

use warehouse TEST;  -- An Extra Small warehouse is best for this test.
use role SYSADMIN;   -- Could be any role except for ACCOUNTADMIN. The ACCOUNTADMIN will own the SP to test views and grant usage to this role.
use database TEST;   -- Could be any database; just put one in context.

use role ACCOUNTADMIN; -- We need to create the stored procedure as ACCOUNTADMIN to ensure we have read access to all views.

/********************************************************************************************************************

Procedure:   TestAllViews
Description: Executes as ACCOUNTADMIN and attempts to select a single row from every view in the account. For each
             view in the account, it returns "Success" if it can read a single row, or "Failure" and the error 
             message if it fails trying to read a single row. This enables a quick sanity check of the views after
             changing objects, such as dropping a table, view, or column.
Parameters:  None.
Return:      A string with each line the test result of each view.
Notes:       This is a prototype SP. Future versions will have parameters to limit databases and schemas to check.

*********************************************************************************************************************/
create or replace procedure TEST.PUBLIC.TestAllViews()
returns string
language JavaScript
execute as OWNER
as
  $$  
   
    var sql_command = 
    `select DATABASE_NAME from INFORMATION_SCHEMA.DATABASES;`;
    
    var databaseArray = new Array();

    try {
            var stmt = snowflake.createStatement( {sqlText: sql_command} );
            var resultSet = stmt.execute();
            
            while (resultSet.next())  {
                databaseArray.push(resultSet.getColumnValue('DATABASE_NAME'));
            }
        }
    catch (err)  {
        return "Failed: " + err;   // Return a success/error indicator.
        }
    
    var outString = '';
    var index = 0;
    
    var viewArray = new Array();
    
    while (index < databaseArray.length) { 
        
        sql_command = "select TABLE_CATALOG, TABLE_SCHEMA, TABLE_NAME from " + databaseArray[index] + 
                      ".INFORMATION_SCHEMA.VIEWS where TABLE_SCHEMA <> 'INFORMATION_SCHEMA';";
        
        try {
            var stmt = snowflake.createStatement( {sqlText: sql_command} );
            var resultSet = stmt.execute();
            
            while (resultSet.next())  {
                viewArray.push(resultSet.getColumnValue('TABLE_CATALOG') + "." + 
                               resultSet.getColumnValue('TABLE_SCHEMA') + "." + 
                               resultSet.getColumnValue('TABLE_NAME'));
            }
        }
    catch (err)  {
        return "Failed: " + err;   // Return a success/error indicator.
        }
      
      index++; 
    }
    
    index = 0;
    
    // We now have a complete list of views... Test them one at a time...
    
    var outArray = new Array();

    index = 0;

    while (index < viewArray.length) { 
      sql_command = "select * from " + viewArray[index] + " limit 1;";

      try {
        var stmt = snowflake.createStatement( {sqlText: sql_command} );
        var resultSet = stmt.execute();
        
        outArray.push("Success..." + viewArray[index]);
      }
      catch (err) {
        outArray.push("Failure..." + viewArray[index] + " : " + err.message.replace(/(\r\n|\n|\r)/gm, " - "));
       }
      index++; 
    }

    index = 0;    

    while (index < outArray.length) { 
      outString += outArray[index] + "\n"; 
      index++; 
    }   

   return outString;

  $$;

grant usage on procedure TEST.PUBLIC.TestAllViews() to role SYSADMIN;

use role SYSADMIN;

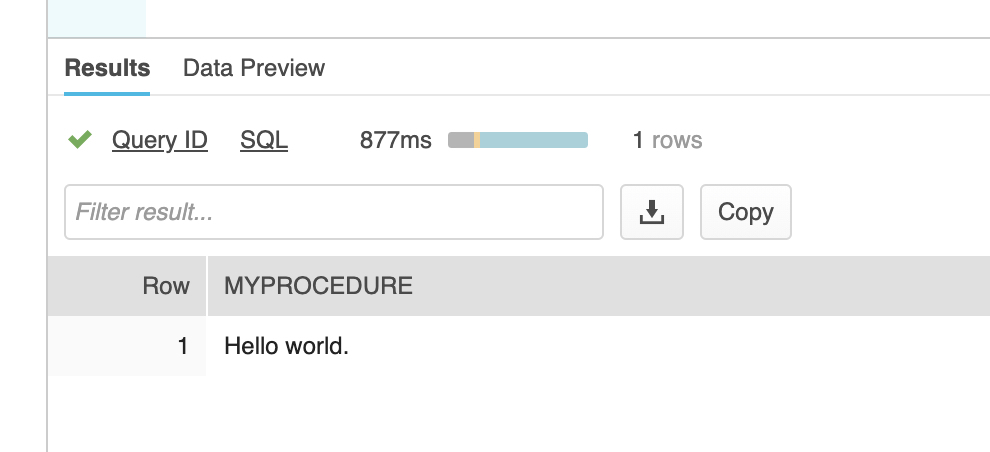
call TEST.PUBLIC.TestAllViews();
-- Note: Completing this SP could take a long time.

/*

The output should look something like this (note dropped table "TEST.VIEWTEST.A" to break view "TEST.VIEWTEST.C")

Success...CITIBIKE_BIG_V2.CLUSTERED.TRIPS_VW
Success...CITIBIKE_BIG_V2.CLUSTERED.TRIPS_WEATHER_VW
Success...CITIBIKE_BIG_V2.UNCLUSTERED.TRIPS_VW
Success...CITIBIKE_BIG_V2.UNCLUSTERED.TRIPS_WEATHER_VW
Success...SALES.PUBLIC.REVENUE
Success...SALES.PUBLIC.SALES_REVENUE
Success...SALES_05_31_19.PUBLIC.REVENUE
Success...SALES_05_31_19.PUBLIC.SALES_REVENUE
Success...TEST.AUDIT.NEW_VIEW
Failure...TEST.VIEWTEST.C : SQL compilation error: - Failure during expansion of view 'C': SQL compilation error: - Object 'TEST.VIEWTEST.A' does not exist.
Success...TEST.PUBLIC.ORDERS_SECURE_VIEW
Success...TEST.TPCH_SF1.ORDERS_SECURE_VIEW
Success...TEST_CHAR.PUBLIC.V_TEST_CHAR

*/
Preserving Table Change History Indefinitely

Preserving Table Change History Indefinitely

Snowflake supports Time Travel and Stream retention up to 90 days. What if you need to preserve the history indefinitely? You can do that by making a Zero Copy Clone at intervals shorter than the Time Travel retention period.

Suppose Finance sends you occasional corrections to a table containing sales records. For a handful of records, UPDATE statements correct the figures. For large-scale corrections you use MERGE operations. The table now contains the corrected figures, but what if for audit and reporting purposes you need to know the values as they existed before correction?

Time Travel allows this for up to 90 days, but we can keep that history indefinitely by making Zero Copy Clones. Here’s an example:

-- Snowflake's Zero Copy Cloning preserves table history for up to 90 days.
-- To preserve change history indefinitely, create a Zero Copy Clone
-- more frequently than the time travel retention period.

use role sysadmin;
use database TEST;
use schema SALES;
use warehouse TEST;

-- First, check how long Snowflake is set to preserve Time Travel data for the table
select RETENTION_TIME from INFORMATION_SCHEMA.TABLES where TABLE_NAME = 'SALES_FACT';

-- If necessary, increase the duration so you can clone it before Time Travel data rolls off.
alter table SALES_FACT set data_retention_time_in_days = 30;

-- Optionally, create a new schema to keep the historical clones. This will keep the base table
-- schema cleaner.
create schema if not exists SALES_FACT_HISTORY;

-- Run the remaining section as frequently as required to get the needed granularity of history 
-- preservation. For critical tables in regulated industries, it may be necessary to create 
-- a clone after every UPDATE or MERGE performed.

-- You'll need to create a dynamic table name, usually based on date.
set CLONE_TABLE_NAME = 'SALES_FACT_HISTORY.SALES_FACT_CLONE_' || to_varchar(CURRENT_DATE, 'YYYY_MM_DD');

-- Optionally check the name we'll use for the table
--select $CLONE_TABLE_NAME;

-- Use the identifier() SQL function to use a SQL variable as an object name.
-- Run this statement once a month, once a week, or any duration more frequent than the
-- table's Time Travel retention period.
create table identifier($CLONE_TABLE_NAME) clone SALES_FACT;

When preserving change history, there’s an important consideration for highly-regulated data. Time Travel and Streams preserve a complete record of every change to a table. Creating a clone preserves the state only at the time it’s cloned. What does this mean in practice?

Suppose you clone a table once a day at midnight. Months later, Finance sends revised sales figures. You update the rows quickly. A few hours later, Finance notices a miscalculation and sends corrected values. When you apply updates to the same rows twice that day, the clone at midnight will reflect only the later change. For most data, this is probably fine. For highly regulated data, it may not be acceptable. In this case, you’ll need to perform a clone after every update or merge that updates rows.

Setting the Default Timezone for a Snowflake Account

Setting the Default Timezone for a Snowflake Account

By default, Snowflake accounts have their timezone set to US/Pacific. Here is how to change that permanently at the account level. You can still override it for specific users or sessions.

Set the account’s default time zone to US Eastern:

use role ACCOUNTADMIN;  -- Must have ACCOUNTADMIN to change the setting.
alter account set TIMEZONE = 'America/New_York';
use role SYSADMIN;  -- (Best practice: change role when done using ACCOUNTADMIN)

Set the account’s default time zone to UTC (Universal Coordinated Time, also called Greenwich Mean Time, GMT, or Zulu Time):

use role ACCOUNTADMIN; 
alter account set TIMEZONE = 'Etc/UTC';
use role SYSADMIN;

A complete list of timezone is available here: https://en.wikipedia.org/wiki/List_of_tz_database_time_zones.

Executing Multiple SQL Statements in a Stored Procedure

Executing Multiple SQL Statements in a Stored Procedure

A classic DBA technique to run a large number of SQL statements is to create them using a concatenated select statement. Suppose you need to delete all tables that end with “TEST”. You can list them in Snowflake’s INFORMATION_SCHEMA using:

select “TABLE_NAME” from INFORMATION_SCHEMA.TABLES where “TABLE_NAME” ilike ‘%TEST’;

If you need to drop a handful of tables that way, a list if enough. If there are dozens or hundreds, this works better:

select 'drop table ' || "TABLE_NAME" || ';' from INFORMATION_SCHEMA.TABLES where "TABLE_NAME" ilike '%TEST';

The above example generates a drop statement for each table in a database that ends with TEST. You can use this technique to generate bulk SQL to perform a wide range of management tasks. For example you may want to change the ownership of tables in bulk like this:

SELECT 'grant ownership on table ' || 
       table_name || 
       ' to role my_new_role copy grants;' 
       AS SQL_COMMAND
FROM INFORMATION_SCHEMA.TABLE_PRIVILEGES 
WHERE grantor = 'old_grant_role';

Executing this SQL will generate rows that look like this:

RowSQL_COMMAND
1grant ownership on table CUSTOMER to role my_new_role copy grants;
2grant ownership on table LINEITEM to role my_new_role copy grants;
3grant ownership on table NATION to role my_new_role copy grants;
4grant ownership on table ORDERS to role my_new_role copy grants;

You can see where this is heading. A SQL statement generates statements to run, and then someone — or preferably something by automation — runs them.

Here is that something. The Snowflake stored procedure below will:

  • Accept a string parameter that is a SQL statement designed to generate rows of SQL statements to execute.
  • Execute the input SQL statement to generate a list of SQL statements to run.
  • Run all statements identified by the “SQL_COMMAND” column one at a time.
use database TEST;
use warehouse TEST;

create or replace procedure RunBatchSQL(sqlCommand String)
    returns string
    language JavaScript
as
$$
/**
 * Stored procedure to execute multiple SQL statements generated from a SQL query
 * Note that this procedure will always use the column named "SQL_COMMAND"
 *
 * @param {String} sqlCommand: The SQL query to run to generate one or more SQL commands 
 * @return {String}: A string containing all the SQL commands executed, each separated by a newline. 
 */
      cmd1_dict = {sqlText: SQLCOMMAND};
      stmt = snowflake.createStatement(cmd1_dict);
   
      rs = stmt.execute();

      var s = '';

      while (rs.next())  {
          cmd2_dict = {sqlText: rs.getColumnValue("SQL_COMMAND")};
          stmtEx = snowflake.createStatement(cmd2_dict);
          stmtEx.execute();
          s += rs.getColumnValue(1) + "\n";
          }
          
      return s;
      
$$
;

-- This is a select query that will generate a list of SQL commands to excute, in this case some grant statements. 
-- This SQL will generate rows to grant select on all tables for the DBA role (change to specify another role). 
select distinct ('grant select on table ' || table_schema || '.' || table_name || ' to role DBA;') AS SQL_COMMAND
from INFORMATION_SCHEMA.TABLE_PRIVILEGES
where TABLE_SCHEMA <> 'AUDIT'
order by SQL_COMMAND;

-- As a convienience, this grabs the last SQL run so that it's easier to insert into the parameter used to call the stored procedure. 
set query_text = (  select QUERY_TEXT
                    from table(information_schema.query_history(result_limit => 2))
                    where SESSION_ID = Current_Session() and QUERY_TYPE = 'SELECT' order by START_TIME desc);

-- Confirm that the query_text variable has the correct SQL query to generate our SQL commands (grants in this case) to run.
select $query_text;

-- Run the stored procedure. Note that to view its output better, double click on the output to see it in multi-line format,
Call RunBatchSQL($query_text);

--Check the last several queries run to make sure it worked.
select QUERY_TEXT
from table(information_schema.query_history(result_limit => 100))
where SESSION_ID = Current_Session() order by START_TIME desc;
Capturing Audit Trails in Snowflake

Capturing Audit Trails in Snowflake

This article discusses two types of audit trails, 1) SQL statement execution logs, and 2) session logs for security.

The Snowflake documentation discusses the QUERY_HISTORY functions, which “return query activity within the last 7 days.” Although limited to seven days, these functions provide an easy way to create a SQL log retained indefinitely.

--Create database AUDIT_DB
create database AUDIT_DB;

Next, create a SQL audit table with all available information returnable from the QUERY_HISTORY function.

--Create an audit table
create table "AUDIT_DB"."PUBLIC"."AUDIT_LOG" as
select *
  from table(information_schema.query_history(RESULT_LIMIT=>10000))
order by START_TIME;

Since the QUERY_HISTORY returns up to seven days of SQL statement history, to preserve the log indefinitely this SQL needs to run at least once every N days where N < 7:

--Add new audit items to the table
insert into "AUDIT_DB"."PUBLIC"."AUDIT_LOG"
  select * from table(information_schema.query_history(RESULT_LIMIT=>10000))
  where START_TIME > (select max(START_TIME) as LASTDATE from AUDIT_DB.PUBLIC.AUDIT_LOG)
order by START_TIME;

CHAR Padding in Snowflake

CHAR Padding in Snowflake

For strings that need to be fixed-width, it’s common to use the CHAR data type, for example CHAR(10). In this example, often databases will right pad a field has fewer than 10 characters with spaces.

If we define a CHAR(10) and store “ABCDE” in the field, some databases will add spaces on the right to fill the 10 width. In the example below, the “.” character represents the space:

Column_Name
1234567890
ABCDE.....

A side effect of the advanced way Snowflake stores strings is that a column defined as CHAR(10) with only 5 characters such as “ABCDE” will return only the five characters instead of 10 such as “ABCDE “. From the Snowflake documentation:

Snowflake currently deviates from common CHAR semantics in that strings shorter than the maximum length are not space-padded at the end.

https://docs.snowflake.net/manuals/sql-reference/data-types-text.html#char-character

For use cases where fixed-width of strings is important, there are a couple of options. One option is to right pad the strings on ingest, but this adds work and storage overhead.

I think a better way is to create a simple view that returns right padded strings for columns defined as CHAR. Fortunately, the Snowflake RPAD function makes this easy.

The following sample explains how to create a view to ensure fixed-width columns. Note that since CHAR is a synonym for VARCHAR, this technique will work with columns defined as CHAR, VARCHAR, STRING, CHARACTER, and TEXT.

--Create a simple test table with a CHAR(10)
create table TEST_CHAR
    (
    TEST_COLUMN char(10)
    );

--Insert some values 
insert into TEST_CHAR (TEST_COLUMN) values ('1234');
insert into TEST_CHAR (TEST_COLUMN) values ('12345');
insert into TEST_CHAR (TEST_COLUMN) values ('1234567890');

--Create a view that right pads the CHAR fields to width 10
--Change the space to another character to see the effect.
create or replace view V_TEST_CHAR as
select RPAD(TEST_COLUMN, 10, ' ') as TEST_COLUMN from TEST_CHAR;

--Select from the view.
select * from V_TEST_CHAR;
Creating a Hello World Stored Procedure in Snowflake

Creating a Hello World Stored Procedure in Snowflake

Snowflake makes creating stored procedures easy. Make sure that you have the database in context where you want to create the stored procedure.

--Create a hello world Snowflake Stored Procedure.
create or replace procedure MyProcedure()
--Optionally return a value, only one.
returns VARCHAR
language JavaScript
as
  -- The "$$" indicates the beginning and end of the JavaScript code
  -- in the stored procedure
  $$  
  
  // Since we're in Javascript now, use Javascript comment markers.
  return "Hello world."
  
  $$;
  

Now, let’s run the stored procedure.

  --Call the stored procedure.
  call MyProcedure();

The output will look like this:

Conditional Column Masking Based on Role

Conditional Column Masking Based on Role

Snowflake secure views offer a powerful way to control who gets to see what. One way to secure data is to mask a column’s value based on who is accessing the data set.

First a bit of background on Snowflake views. They are not dynamic. Here is the section of the documentation explaining this:

View definitions are not dynamic, i.e. a view is not automatically updated if the underlying sources are modified such that they no longer match the view definition, particularly when columns are dropped. For example:

A view is created referencing a specific column in a source table and the column is subsequently dropped from the table.

A view is created using SELECT * from a table and any column is subsequently dropped from the table.

In practice what this means for data security and data privacy is that Snowflake secure views will mask column values rather than suppress the column entirely. Here’s an example of how to mask a column based on who is viewing the data. This example uses the currently logged in role to determine visibility rights, which is a best practice, but it could also check the current logged in user as well.

-- Log in as DBA or a login with appropriate permissions

-- Set the context. We'll be using the TEST warehouse (Extra Small
-- size is fine for this test), and a database named TEST. 
-- Create them if not already present.
use warehouse TEST;
use database TEST;

--Create and use schema TPCH_SF1, where we will copy some data from
--the Snowflake Sample data 
create schema TPCH_SF1;
use schema TPCH_SF1;

-- Create a writable table from the Snowflake sample data.
create or replace table ORDERS as 
  select * from SNOWFLAKE_SAMPLE_DATA.TPCH_SF1.ORDERS;

--Make sure there are 1.5 million rows in the order table:
select count(*) as ROW_COUNT from ORDERS;

-- Mask the sensitive column from anyone not logged in using the DBA role:
create or replace secure view ORDERS_SECURE_VIEW as
select
O_ORDERKEY, O_CUSTKEY, O_ORDERSTATUS, O_TOTALPRICE, O_ORDERDATE, O_ORDERPRIORITY,
case current_role()
    when 'DBA' then O_CLERK
    else '*****'
end as O_CLERK,
O_SHIPPRIORITY, O_COMMENT
from ORDERS;

--Grant permissions to the Analyst role
grant usage on warehouse TEST to role ANALYST;
grant usage on database TEST to role ANALYST;
grant select on table ORDERS to role ANALYST;
grant select on view ORDERS_SECURE_VIEW to role ANALYST;
grant usage on schema TEST.TPCH_SF1 to role ANALYST;

--Test the following sections with the DBA and Analyst roles.
--The DBA will see unmasked data in the O_CLERK column.
--The Analyst will see masked data.

--Confirm the currently logged-in session's role:
select current_role() as current_role;

--Test our view using different roles, only the DBA role
--should see the unmasked data:
use warehouse TEST;
use database test;
use schema TPCH_SF1;
select * from orders_secure_view limit 10;

--Suspend our warehouse to save credits.
alter warehouse test suspend;   
Geolocation of IP Addresses in Snowflake – Part 2

Geolocation of IP Addresses in Snowflake – Part 2

One of the thing needed to test Geolocating a weblog is, well, a weblog. As it turns out, this is not an easy thing to do. After some research, I located a partially obfuscated Apache web log from the US Securities and Exchange Commission (SEC) available here:

https://www.sec.gov/dera/data/edgar-log-file-data-set.html

Their weblogs obfuscate the final quad of the IPv4 dotted quad, so they look like this: 192.168.1.jjr.

According to their documentation, their method will always replace the final number from 0 to 255 with the same three-letter value. The SEC does not disclose that “jjr” maps to something like 134, but for the purposes of this test it’s acceptable to assign all 256 unique three letter replacements with numbers from 0 to 255.

After downloading the log file named “log20170630.zip”, we need to load it to a stage and use a file format to parse it. Here is the file format I used:

ALTER FILE FORMAT "TEST"."IP2LOCATION".IP_LOG SET COMPRESSION = 'AUTO' FIELD_DELIMITER = ',' RECORD_DELIMITER = '\n' SKIP_HEADER = 1 FIELD_OPTIONALLY_ENCLOSED_BY = 'NONE' TRIM_SPACE = TRUE ERROR_ON_COLUMN_COUNT_MISMATCH = TRUE ESCAPE = 'NONE' ESCAPE_UNENCLOSED_FIELD = '\134' DATE_FORMAT = 'AUTO' TIMESTAMP_FORMAT = 'AUTO' NULL_IF = ('\\N');

After loading the data into a table (I called mine IP_LOCATION), the next thing to do is replace the three-letter obfuscated replacements with numbers from 0 through 255. To do this, I ran an ELT process replace these values using these steps:

Step 1: Create a new table with all the columns from the original web log, plus a new column to hold the last three characters of the IP number (the three-letter replacement).

Step 2: Create a table with each of the distinct values in the new column. There will be 256 representing numbers from 0 through 255. For the purposes of this exercise, it is not important which numbers map to which three-letter replacements, so I assigned them in sequential order from 0 through 255 in the order returned in the select distinct query. I called these IP numbers simulated, even though only the final quad of the dotted quads is simulated.

Step 3: Convert the IP dotted quads into IP numbers using the UDF in Part 1 of this series. The SQL looks like this:

create table IP_INT_LOG as(
select IpToInteger(SIMULATED_IP) as IP_NUMBER, IP, SIMULATED_QUAD, SIMULATED_IP, REQUEST_DATE, REQUEST_TIME, ZONE, CIK, ACCESSION, EXTENSION, CODE, SIZE, IDX, NOREFER, NOAGENT, FIND, CRAWLER, BROWSER from IP_LOG);

I was concerned about performance running a Javascript UDF millions of 20,488,579 times to convert IP dotted quads into IP numbers. It turned out I needn’t have been concerned. Snowflake converted all 20.5 million in 16.97 seconds using an Extra Small (XS) warehouse. Out of curiosity, I dropped the resulting table and increased the size of the warehouse to a medium (M) and it ran in 7.85 seconds. This provides empirical evidence that increasing the warehouse size improves performance including those with UDFs.

This led me to the final part of the experiment — resolving the IP numbers in the web log to the geolocations. We have the IP numbers in the a log table, and the IP geolocations in another. My first thought was to join the tables, but this is an unusual join. The standard join matches keys. In this example, we need to use inequalities to join the table. In other words, join the IP log information with the geolocation data where the IP log’s IP number falls between the lower and upper bounds of a locations address range.

select 
L.COUNTRY_ABBREVIATION, L.COUNTRY, L.STATE_OR_PROVINCE, L.CITY, L.LATITUDE, L.LONGITUDE, L.POSTAL_CODE, 
I.IP_NUMBER, I.IP, I.SIMULATED_QUAD, I.SIMULATED_IP, I.REQUEST_DATE, I.REQUEST_TIME, I.ZONE, I.CIK, I.ACCESSION, I.EXTENSION, I.CODE, I.SIZE, I.IDX, I.NOREFER, I.NOAGENT, I.FIND, I.CRAWLER, I.BROWSER
from IP_INT_LOG I, IP_LOCATION L
WHERE I.IP_NUMBER BETWEEN L.START_NUMBER AND L.END_NUMBER
limit 10;

Note: This procedure is missing one important change that dramatically improves performance. This will be the topic of a follow-on Part 3 of this post.

Geolocation of IP Addresses in Snowflake

Geolocation of IP Addresses in Snowflake

It’s probably a safe assumption that business intelligence and data science teams can get valuable insights knowing the geolocation of website visitors. Suppose a product launch gets lots of web traffic, but the only source of information on visitors is the web log. Some web server statistics report on traffic grouped by nation, but what if we want to get much more granular information and incorporate this information with the main data warehouse?

Let’s take one sample web server among many, Apache Web Server, and quickly examine the structure of a log entry. Here’s a line in a sample Apache Web Server log.

64.242.88.10 - - [07/Mar/2004:16:05:49 -0800] "GET /twiki/bin/edit/Main/Double_bounce_sender?topicparent=Main.ConfigurationVariables HTTP/1.1" 401 12846

In the Apache documentation, we can get more detailed information on the meaning of each field in the line, but for now we’re going to concentrate on 1) how to load the web logs into Snowflake, and 2) the key aspects for business intelligence and geolocation.

Loading the data is a quick proposition. Even without reading the Apache documentation it’s clear that the web log is space delimited and wraps any fields with spaces inside double quotes. Snowflake provides a very simple way to ingest structured data in flat files using File Formats. You can create a file format using SnowSQL (documented here: https://docs.snowflake.net/manuals/sql-reference/sql/create-file-format.html) or you can use the Snowflake Web UI (documented here: https://docs.snowflake.net/manuals/user-guide/data-load-web-ui.html#step-1-open-the-load-data-wizard).

Note: Although the Apache Web Log is space delimited, we will use the CSV option for the Snowflake File Format — simply change the delimiter from a comma to a space.

After loading the data, we now need to geolocate the web hits. Problem: the Apache Web Server log, as most web logs, does not show anything for geolocation. Fortunately in most cases, we can use the visitor’s IP address to get fairly accurate geolocation.

Third party services keep up to date databases of IPv4 and IPv5 geolocation data. Once such service I found at https://lite.ip2location.com includes free databases with less rich information than the paid versions. In my testing I found the free databases accurate and useful, though production BI or data science work should consider the paid versions.

The next question is how to resolve millions or billions of web log lines’ IP address to approximate geolocation. This is where Snowflake shines. The IP2Location LITE comes as a flat structured file with millions of rows After creating another Snowflake File Format, it’s an easy matter to turn the IP2Location flat file into a Snowflake table. From there, Snowflake’s powerful massive-scale join make it a simple matter to create a joined view that shows the IP’s approximate location.

There’s one final issue to get this all working. The IP2Location data comes with IPs represented by 32-bit integers, not the familiar dotted quad notation. This makes it much easier to use code and database routines that search for ranges of IPs that all happen to be in the same area by specifying a lower and upper range for the IP number.

IP Dotted Quad:     IP 32-bit Integer, Decimal
192.168.1.1         3232235777

This means we need to convert our dotted quad values into 32-bit integer values. Fortunately, Snowflake makes that easy with a UDF (User Defined Function):

--Convert an IPv4 Dotted Quad into an IP Number
create or replace function IpToInteger(ipAddress varchar)
  returns double 
  language javascript
  strict
  as '
    
    var ipQuad = IPADDRESS.split(".");
 
    var quad1 = parseInt(ipQuad[0]);
    var quad2 = parseInt(ipQuad[1]);
    var quad3 = parseInt(ipQuad[2]);
    var quad4 = parseInt(ipQuad[3]);
    return (quad1 * 16777216) + (quad2 * 65536) + (quad3 * 256) + quad4;

  ';

You may have noticed that the function returns a double, when we know the return will be a 32-bit integer. The reason is that all numeric values in Javascript are floating point, and fortunately we won’t be encountering any issues with precision (i.e. 0.9999999999 != 1) since we’re dealing with only multiplication and addition.

This is one possible approach, but running the Javascript millions or billions of times to get the value concerns me from a performance perspective, so in my next post I’ll explore the possibility of using straight SnowSQL to convert a dotted quad into a 32-bit integer.

Theme: Overlay by Kaira